Know about Home Theatre Projector Installation below.
Congratulations on your new projector, whether you received it as a gift or bought it for yourself this holiday season! There’s no better way to acquire a huge image for a fantastic movie night than this.
The procedure of Home theatre projector installation might be pretty confusing if you’ve never done it before. The broad concept is straightforward, and you presumably already know where you want each piece to go, but the details are obscure.
The best part is that putting together a projector-based home theatre is rather simple isn’t any more complicated than putting up a standard home theatre, it does, however, need a bit more planning. You can’t just take your projector out of the package and begin watching films on it as you would on TV.
The trick is to plan properly for your project and buy everything you need, and you know how to spend your money and make the best out of your home theatre.
Contents
Home theatre projector installation
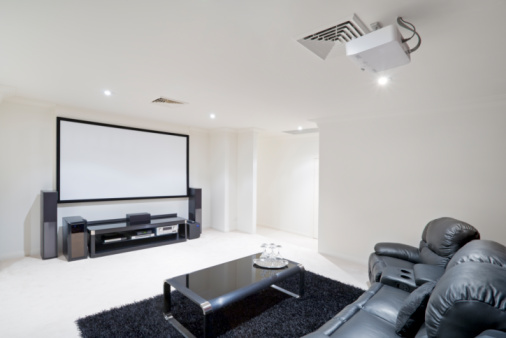
1. Projector Location-
Lens shift is a feature that is missing from the great majority of low-cost projectors. This necessitates their positioning in relation to the screen, which is frequently in line with the top or bottom of the screen. The throw angle can be much larger in some cases, requiring it to be below or over the screen’s edge.
This is counter-intuitive, because you might think you need to align the projector with the screen’s centre. This is nearly never the case with low-cost DLP projectors, and it is almost never the case with low-cost LCD projectors. Lens shift on higher-end LCOS projectors, such as those from Sony and JVC, allows for a wider range of vertical placement possibilities.
The distance from the screen comes next. With the exception of short-throw projectors, most projectors can fit a 100-inch screen from a distance of around 10-feet. However, this can vary, so double-check before you start making holes in your ceiling. Most projectors have a restricted zoom range, which means you’ll only have a few feet of “perfect spot” to fill a specific-sized screen. This information is nearly always available on the projector’s manufacturer’s website or in the owner’s handbook.
2. Select the correct screen-
If you’re in a hurry, you can project the image from a projector straight onto a wall or hang a white piece of fabric. It’s worth dedicating a chunk of your budget to a high-resolution screen if you’re establishing a full-fledged home theatre.
The screen’s impact in your watching experience cannot be underestimated. There aren’t many empty, white walls the size of a projector in most homes. Most projector screens are also intended to improve contrast or picture quality, which can be quite useful in situations when there is a lot of artificial light or other limitations. For example, micro-perforations allow speakers to be put beneath the display for full stereo sound.
3. Power Up and connect Your Sources-
The majority of today’s projectors have HDMI connectors, as well as hybrid, video component wire, and Computer monitor inputs, and are intended for home theatre use. Check your device has the ones you need before making a purchase.
Here are some general rules for connecting sources such a DVD player, gaming console, streaming media gadgets, computer, or home theatre receiver:
1. When the projector is turned on, the company logo appears first, followed by a notice informing the display is looking for an available input source.
2. Select and activate the associated sources. If the projector is unable to locate your active source, you can select it directly using the distant or internal source selection buttons.
3. When the unit locates your current source, you’ll know it’s operating. Go into the menu and choose your projector’s location to fix the image alignment (front, front ceiling, rear, or rear ceiling).
4. Adjust the projected image, which is most likely the source device’s on-screen menu. After the unit has been turned on, use any of the built-in test patterns available through the on-screen menu.
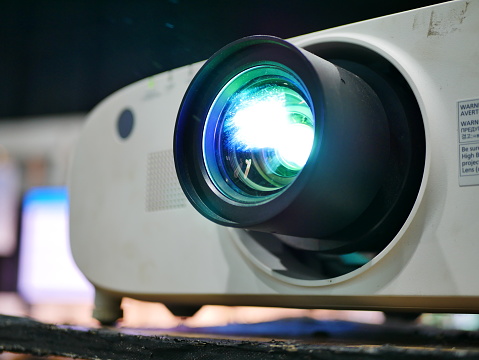
4. Zoom and Focus-
After you’ve obtained the proper image form and angle, utilise the focus and zoom buttons to get a clear image.
Use the zoom control to make the image fill your screen. Once the image is the right size, use the focus control to make it visible to your eye from your sitting position. Most projectors have manual zoom and focus settings, but others have motorised zoom and focus controls that may be adjusted using the remote control.
The controls of zoom and focus are generally located on the device’s top, just below the lens component, however, they are often positioned on the lens’s exterior.
5. Sound Quality-
The built-in speaker on the projector will not work. It’s like purchasing a Ferrari and fitting it with wheelbarrow tyres. The audio will never be able to compete with the incredible images.
The cheapest way is to get a good speaker and attach it to an analogue connection. Several projectors include Bluetooth capabilities. If you have the choice, opt with analogue.
It would be better to use a soundbar or a receiver with speakers. Connect all of these via HDMI for a real home theatre experience.
6. Finish the installation-
Attach your screen permanently, if necessary, connect your projector, and find a permanent spot for your speaker systems. Make sure no wires or cables are dangling from the roof, thrown on sidewalks, or anywhere else that can provide a danger. Make sure the sound and picture on all input channels are functional and aligned before calling it a day. See the cost of Home Theatre Projector Installation.
Home theatre projector installation cost
Make a list of everything you’ll need to complete your home theatre. This will tell you how many different ways you’ll have to divide your budget-
The projector costs between $500 and $1,000.
The cost of a good-quality screen is $50 to $100.
A sound system will cost you between $50 and $80.
Ceiling mounts and cables, for example, will cost you between $25 and $40.
FAQ
1. How long does a home theatre projector installation work?
A good quality projector will last around 4-5 years.

I’m Steven Berry and I’m the proud owner of an electronics store. With years of experience in the industry, I’m passionate about providing top-quality projectors to customers who want to take their entertainment or business presentations to the next level. Browse my store and let me help you find the perfect projector for your needs.