If you have bought a projector recently and want to know how to prepare it for playing video games or watching TV shows or movies, you have come just to the right place. Here, we will be sharing with you some tips that will help set up your best projector for home perfectly.
As you may already understand, projectors need more hassle and setup as compared to televisions. The users willfirst need to get the right space. Then, they will have to figure out the perfect settings, dial in the focus & more. In the end, as they convert their room into one home theatre, the payoff will be well worth it. They may never want to return to their tiny televisions ever again.
So, here are the above-mentioned steps, discussed in detail below.
- Find the perfect location
The first step will be figuring out where the users will keep the projector. They will require enough space for that projection itself- either one screen (this is the recommended option) or one patch of a blank wall (it should be as close to the white colour as possible). The larger the space, the better the projection.
Projectors can deliver images as small as 40/50 inches & as large as up to 300, measured diagonally. The users need to keep in their mind that the larger images will tend to be dimmer. Depending on the model or type of the projector, the images may start exposing the individual pixels orthe “screen door effect”, if the viewer sits closer to the screen.
- Get the perfect height
The most common orientation for projection is a table mount. The concept is the same for ceiling mounts. If the users don’t get the correct height, images will be trapezoid-shaped. This can be frustrating if they want to match the screen’s edges perfectly.
The “upwards throw” in most projectors means that images are projected above the lens centre. The height depends upon the projector’s model. It is good for mounting on ceilings or placing on coffee tables, as images will be closer to the screen or wall’s centre.
- Plug in & turn on
Now it is time for the users to make connections. Bring an extra-long HDMI cable for that as it provides users with the highest rates of frame& resolutions and the most flexibility. The users will need a soundbar or receiver for connecting and switching the sources.
Once everything is connected, check the different contents available. If your projector is 4k, try watching some 4K content which will help you understand if the system is capable of the resolution.
- Project alignment images
Alignment images can help users make sure they have got all the things lined up. They can turn the lights off & see where the image edges are. They need to make sure that they have real video content.
If the images aren’t rectangular, it is likely because it is not perpendicular to the screens. Measuring the distances for everything may make the alignment of the projector easier. Try avoiding keystone adjustments on your projector. Adjust the focus until you see sharp details.
- Mount the projector & screen
Once you are sure everything, including the orientation of the image, is perfect, mount the screen & the projector permanently. Also, tuck away HDMI cables if there are any, so nobody trips or walks over them.
- Select a picture mode
Projectors include pre-set picture modes like TVs, such as’ cinema’ and ‘movie’, which are perfect for the overall picture quality in dark rooms. If the light is ambient, you can choose brighter modes like ‘dynamic’ or ‘vivid’-they often skew green, blue or both.
There are also lamp and game modes. The first one deals with image brightness. The second one reduces the input lag. It is better for playing games.
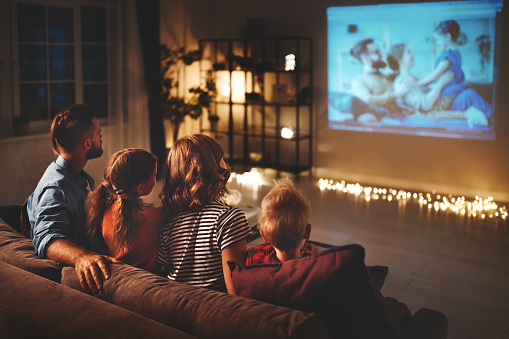
- Turn the lights off and enjoy!
The projected images can be enjoyed best in dark rooms. Here the pictures look best. So just turn the lights of the rooms off and enjoy your favourite shows, movies or games.

I’m Steven Berry and I’m the proud owner of an electronics store. With years of experience in the industry, I’m passionate about providing top-quality projectors to customers who want to take their entertainment or business presentations to the next level. Browse my store and let me help you find the perfect projector for your needs.