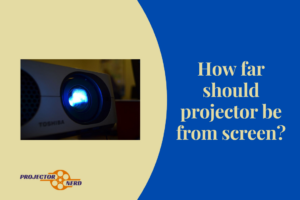
When it comes to the first setup, projectors can be a little finicky. Due to the staggering variety of factors at play, dialing the image into the screen and the unique theatre setup could be puzzling. However, by going slowly and changing one feature at a time, users could perhaps ensure the optimal image quality of the best projector for sports venues by performing the following:
Contents
Adjust Focus Of Projector
- The adjustment ring for physical focus around the lens of your projector alters the focus by decreasing and increasing the distances among elements inside the lens itself.
- This change in the distance either severely limits or broadens the image that emerges from the lens. Often these fuzziness issues are simply small misalignments between the image which is already in focus and the location where the screen is.
- Start with where you’d like the screen to be, then position the device to ensure that it will operate depending upon the throw ratio. As soon as you turn on the device, use the focus ring for moving the light beam slice in which the image looks decent back and forth.
- Recognize, that slice exists all the time; your job with the projector focus knob would be to relocate it to the point where it appears on the screen.
Check Lens For Condensation Or Dust
- Perhaps your entire image is blurry or fuzzy, but only a small portion of it. If a portion of the picture is in focus and appears right, but other of the image’s parts are blurry, or if an entire image is too blotchy to enable you to dial in the focus, this might be due to a problem with the lens of the projector.
- And besides, it’s from here that the light shines, therefore if there are dirty fingerprints and perhaps dust here, it will intrude with the beam of light and cause distortion.
- However, debris may have been able to get onto the projector’s lens which has only been resting for a long time without the assistance of fingerprints. If indeed the projector was ever disassembled, debris could be trapped on the inside of the lens, resulting in the problem, but this is extremely unlikely.
- Large temperature swings may even end up causing condensation to shape inside the lens. If this happens, you simply need to wait for the projector to return to room temperature on its own.
- It’s best to clean the lens when in doubt. If you wipe down the lens using just any kind of cloth, you risk damaging it. Be careful!
Change Projector Positioning Relevant To Screen
- Supposing you’ve by now tried using the focus knob built-in for correcting the image as well as checking the projector lens for debris, fingerprints, and so on, it’s time to begin to think about projector placement.
- Your projector has a requisite for the distance from screen. Or, more precisely, the range of distances it must be intended to project at. If indeed the methods above don’t fix the distortions or cloudiness in the image, it is then time to actually move the device back and forth so that you determine the correct distance from the screen.
Change Resolution Or Sharpness
- Sharpness:
- Sharpness, which describes the clarity as well as the contrast of a picture, is typically a menu-adjustable setting.
- You can employ it to try to fix problems with the image appearing too bleached out or too lively. If the colors in a scene appear “off,” trying to adjust the crispness can help you get them under control.
- Resolution:
- Your projector would be designed to portray at a specific resolution, whereas if you’re trying to send video from a computer via HDMI, you must ensure that the computer understands what size the image ought to be.
- By accessing your computer’s display management settings, users can confirm that the computer understands the target resolution as well as alter it if it’s incorrect.
- The majority of other devices would then automatically output the maximum possible resolution to the display device or the projector.
Adjust Keystone Correction
- After focusing the image using one of the methods described above, you may have to make another set of modifications to enhance the projector’s picture quality: modifications to the image-processing side of the light getting projected.
- The most popular among them is keystone correction, which is a feature found in all projectors and is used to correct problems caused by the projector’s center-line mounting or height not being able to match the screen.
- Vertical and horizontal keystone corrections are available. Start by figuring out which you will most possibly need to experiment with.
- If the device is not centered on the display, the image would be skewed, with one half larger than the other. The horizontal keystone correction corrects this by modifying the image prior to projection.
- Vertical keystone correction is similar, but it addresses problems created by the height of the projector.
- Discovering the keystone or keystone correction configuration in the projector’s menu is easy. Dialing it in by decreasing and increasing the correction factor till the image appears correct, is how you arrange the keystone correction.
These are all simple, well-understood methods for improving projector image quality, and they won’t often come naturally when this is your 1st time.
The Takeaway:
You should have a better idea of how to proceed with correcting your projector image now though. Keep going, and keep in mind that there are a number of variables you might have to adjust and afterward re-adjust once you’ve modified other settings.
It’s fine if you don’t immediately understand what certain of these terms mean or how you can manipulate a few of these settings. With a bit of trial and error, users can dial in their projector and, hopefully, never need to reconfigure it again.

I’m Steven Berry and I’m the proud owner of an electronics store. With years of experience in the industry, I’m passionate about providing top-quality projectors to customers who want to take their entertainment or business presentations to the next level. Browse my store and let me help you find the perfect projector for your needs.